|
|
||||||||
"It's old, heavy, loud and wobbles into corners. It's the me of bikes"
Editor 'arris on the perils of riding the CMG ZX-7 at the 2004 VRRA Endurance Race.
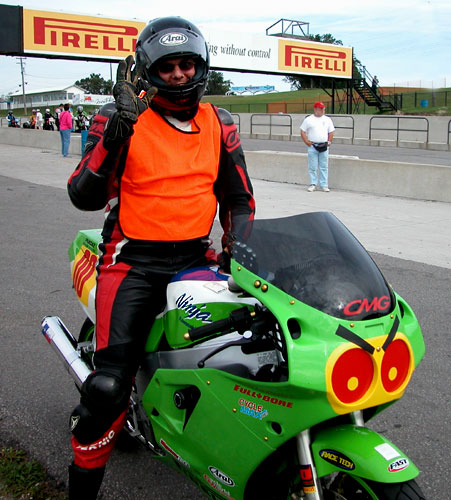 |
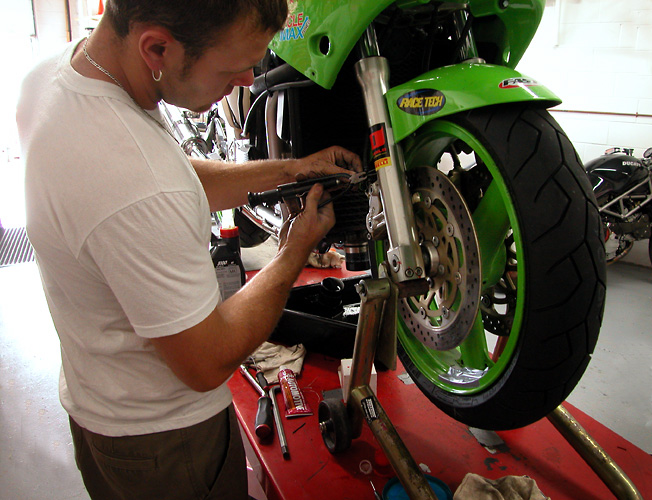
| Editor 'arris was actually quite happy with the ZX after the '04 Mosport VRRA Endurance race. |
Those of you who have been keeping up with the progress of this Period 4 vintage race bike project will no doubt remember that things were really starting to take shape by the time that we rode it at the VRRA endurance race last August.
With the help of the good folks at Cycle Max, we finally had a bike that even Editor ‘arris deemed ridable*, and he subsequently hit the track and rode the best race of his life. As for me, my race would have to wait a little longer, thanks to the race being called short just before I was due to head out for my session.
I've already covered the engine tuning in part one of this series. In this part, I'll review the installation of the suspension parts we used, as well as all the other bits and doodads that were required to make the ageing ZX-7 race-ready. Finally, I'll finish the piece off with how everything has performed to date.
* Sadly, he has been spoiled at new product launches and has forgotten his roots of riding shite bikes faster than they should be ridden …
BOINGERS
RESTORING THE REAR
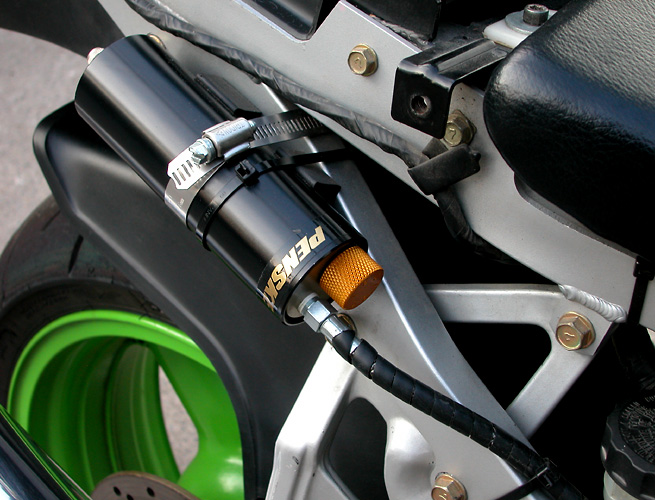 |
| Penske remote reservoir comes with gold knob to play with. |
As mentioned in previous articles, the first port of call for sorting out the ZX-7's sagging suspension was to Penske Racing Shocks to see if they had anything that would fit. Even though the bike is quite old, they still had the original ZX-7's data on hand and were able to build us an ‘8900 Series' shock, along with a nice heavy spring to handle the greater-than-average mass of ‘arris and myself (no, I don't mean we're riding two-up, we're just relatively fat bastards).
No doubt about it, the Penske shock is a nice piece of kit. On the shock body are adjustments for preload and rebound damping, and to keep the shock cooler in a racing environment, it comes with a remote reservoir. There's also a shiny gold compression damping adjuster located on this reservoir itself (the stock shock has neither the reservoir or the compression adjustment). Fancy.
Worth mentioning is the simplicity of adjustment on this shock. The rebound adjuster screw is easily accessible; the preload can adjusted in a heartbeat (with a simple tool that is supplied), and the compression adjustment is accomplished by simply turning the aforementioned shiny gold knob.
 |
| "Angry Japanese man" seemed to be unhappy about being left dangling. |
Armed with a factory service manual and motorcycle jack I actually managed to install the shock myself. It proved to be a fairly simple procedure and thankfully sans bodily damage … unlike my recent encounter with a V-Strom side-stand bolt.
FRONTAL FUSSING
Of course, this simplicity did not transfer itself to the front-end, and this is where things got complicated. We already knew something had to be done to bring it up to racing spec, as we had maxed out the fork settings on the stock units during some pre-VRRA track testing. Both preload and rebound were cranked up as high as they could go and still the bike had a tendency to bobble when going into the corners. Although this wasn't life threatening, it wasn't particularly confidence-inspiring either.
Race Tech was the company that kept coming up in our research with regards to sorting out our front-end woes, and we soon found the handy search engine on their site that allows you to find out just what is available for your bike. There's also a useful link that allows you to calculate the correct spring rate for your weight and riding application. Of course, Team CMG required the heaviest springs …
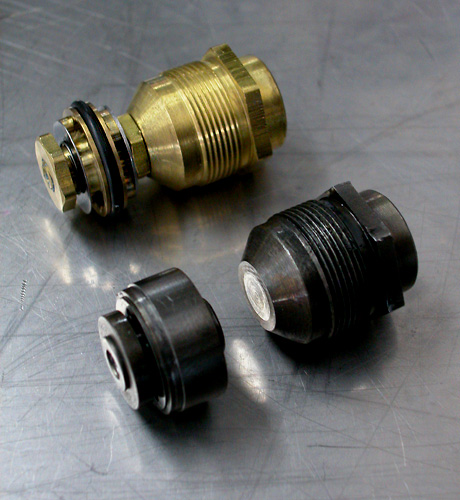 |
| Gold valve (top) replaces the original (bottom). |
A follow-up call to Race Tech resulted with the recommendation that, along with the springs, we should also get a Gold-Valve kit and some Ultra Slick 10-weight fork oil. So that is what we did, and that is what we got.
Apparently if you have cartridge style forks (which the ZX does) and you're not loaded with cash (or able to get free stuff like us) you can get the biggest bang for the buck by simply getting the correct springs for your bike and changing the oil.
I suspect that this alone would have definitely helped the ZX, as the oil that came out of the forks was pitch black. I also suspect it had never been changed since the bike was new.
Speaking of springs, Race Tech uses a non-progressive spring that is generally shorter than the factory unit. The gap that results from a shorter spring is taken up by a spacer that you cut yourself to the desired length.
GLAZING OVER
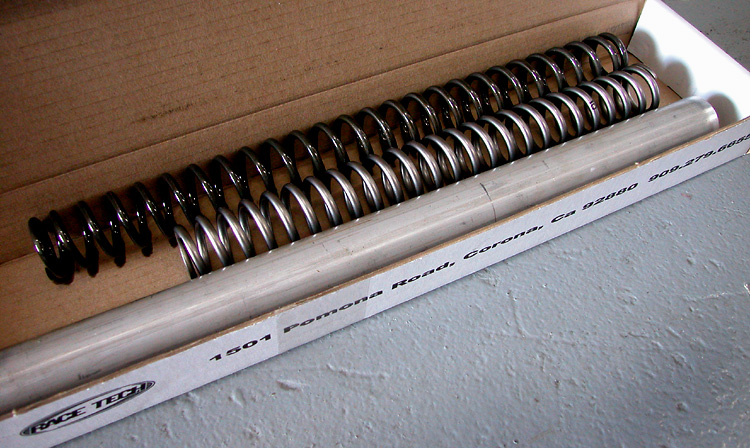 |
| Non progressive Race Tech springs come shorter than stock. |
The stuff arrived soon after my call and included a handy installation video, showing you just how to fit the Race Tech parts, or (in my case) to determine whether I should actually attempt the installation of the bits myself. What I found is that if you glaze over within the first 5 minutes of the video, you should simply shut the TV off, call your local race shop and book an appointment for them to fit the parts.
Resigned to the fact that I was beaten by the installation video, I thought I should at least be able to get my head around just why a Gold Valve kit would provide such a big improvement over a stock system. According to all the blurbage supplied, the Gold Valve kit is designed to allow you to precisely cater the damping characteristics of your forks ... Err, yes, but then aren't all adjustable forks meant to do this?
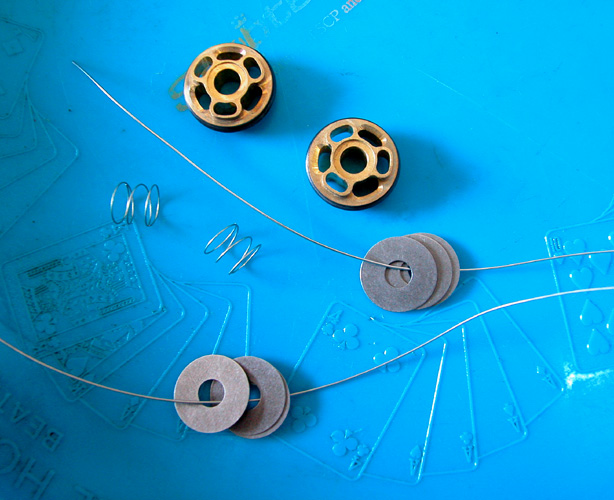 |
| Gold valves and shims. |
Now, this whole race suspension business seems like a bit of a dark art and, to be honest, I'm still not exactly sure how it all works, so here's how Race Tech describe the Gold Valve Kit:
"Stock (fork) valving pistons have very restrictive ports. This makes it impossible to get the ultimate results with the stock pistons. Gold Valves triple the flow area putting valving control on the shim stack instead of the overly restricted stock piston. This results in outstanding tuneability, improved control, traction, plushness and bottoming resistance."
Yes, the glazing over effect continued after reading that blurb for me too, but the potential results sounded good … and who was I to question this anyway? Let's just say in typical CMG tradition I was happy to hand over the complete installation duties over to our resident expert – Jeff Bloor and the team at Cycle Max.
THEN IT ALL WENT CMG ...
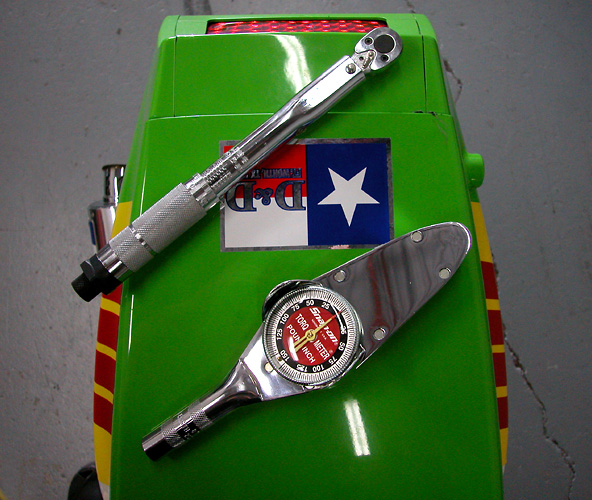 |
| The 'bargain' Chinese torque wrench (top), proved to be anything but. Snap-On wrench (bottom) did the job. |
Once Jeff got the forks apart, much cleaning of all the fork components was required to ensure that the kit functions properly, yet another reason to leave the installation to a professional with a well-equipped shop.
The Gold Valve kit comes with an array of shims that have to be carefully matched in order to get the desired results. After the shims are selected, then comes a delicate step where the shim pack is connected to the Gold Valve assembly via a retaining nut.
Thirty inch-pounds is all that is required for this operation, but after digging through his toolbox for a while, Jeff remembered that he had lent his inch-pound torque wrench to a friend at the track and had failed to get it back. No worries, I had one in my car.
I handed it over to Jeff and he adjusted it to the appropriate setting. He then proceeded to gently tighten the nut whilst awaiting the click of the torque wrench that would indicate the proper torque had been achieved. Sadly this click never arrived – as the wrench kept torquing until the threaded part on the Gold Valve simply snapped off.
 |
| Oh dear, I think it's broke. |
Ouch.
Hmmmh. I guess the two torque wrenches for $70.00 at the Chinese tool outlet wasn't such a good deal after all …
Naturally, this unfortunate incident delayed the completion of the project until I managed to talk the fine folks at Race Tech out of some replacement parts, and Jeff could get his hands on a proper Snap-On torque wrench again.
The forks did eventually come together, but not until after the last track day of the season, which is why it has taken so long to test the results and then get this article sorted. Well, that and the usual CMG tardiness factor.
Even after watching the whole procedure, I wouldn't attempt this operation at home unless I had a very well equipped garage, more time, and a significantly larger brain capacity.
THE FINISHING TOUCHES
 |
| Cycle Max's Jeremy gets the short straw and has to do the dreaded safety wiring. |
If you're going to race, you have to safety-wire your bike. For Period 4 vintage racing, the VRRA has an endless list of bolts that require safety wiring. Click here to get the complete lowdown.
Thankfully, Cycle Max once again came to the rescue by doing the honours. If you want to attempt this yourself, make sure you stock up on hardened drill bits, as many break during the process.
As I know all too well, crashing is always a possibility on the racetrack. Accordingly, it seemed like a good idea to try and source out some frame sliders to help protect the bike's plastic. This turned out to be a fairly difficult task, but thank god for the Germans as they still make them for my ZX – and high quality products at that. The GSG Moko units we used are beautifully made and easy to install.
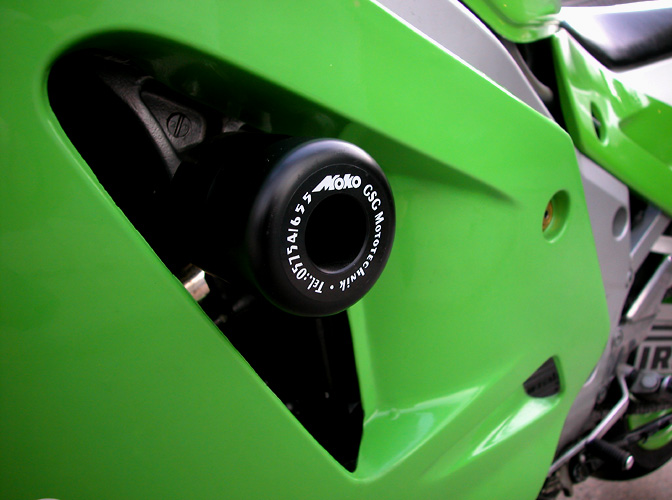 |
| GSG Moko frame sliders should help to protect the plastic in the event of a crash (untested). |
Fortunately we haven't had a chance to test them out as yet.
Tire selection can be interesting for an endurance race, especially if you only have one set of rims. In the end we opted for a set of Pirelli Diablo Corsas. These are the most track-oriented of the Diablo line up, but they differ from full racing tires by having quick warm up times, and a degree of wet weather riding ability.
WELL, WHAT'S THE REAL POOP THEN?
Most of these mods (with the exception of the front suspension bits) were tested at the aforementioned 2004 VRRA endurance race. The bottom line is that the bike had never performed better. The Pirelli tires stuck beautifully and held up for the entire 3-hour race.
 |
|
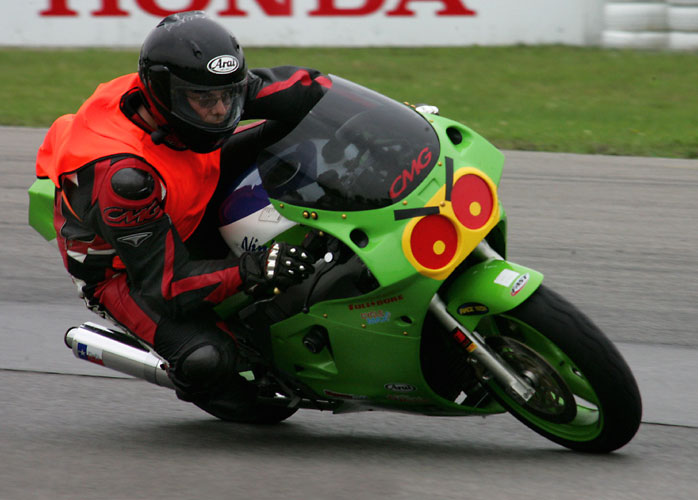
Some bobbling was experienced at the VRRA Mosport 2004 race ... Photo: Colour Tech |
The Penske shock had finally been properly adjusted by Jeff helped to make the bike much more ridable than it had ever been before – with the exception of the aforementioned bobbling from the front-end (which we eventually got used to) when the bike was thrown into the corners.
With a chaotic start to the 2005 riding season, I was finally able to get the beast back on track on the Fabi track at Shannonville recently – complete with the Race Tech front suspension mods. The verdict? It rocks! It goes where you want it go and without fuss– and bobbling in the corners is a thing of the past.
The bike is still a big heavy pig by current standards, but now it's totally working with us as opposed to against us.
We're now looking forward to the 2005 Mosport VRRA endurance race, which takes place on Friday the 19th August. The bike is good to go and hopefully the Team CMG riders will be able to take advantage of its full potential.
 |
|
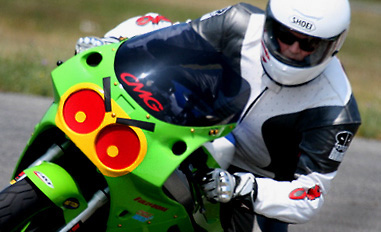
... but was eliminated with the latest suspension upgrades. We think she's now totally ready for the 2005 VRRA Mosport race! Photo: Mike Z, fuzzyriders.com |
In fact, if all goes well, Team CMG is hoping to come out ahead of the Bondo/Tate/Boop/Vincent team and their KZ1000. In fact, we're going to kick their arses!
Hmmmh, Rob, I think we need a ringer …
Jeff?
See you out there!
Cheers, Mr.Seck
THANKS TO:
Pirelli for supplying the Diablo Corsa tires that kept Team CMG on the track.
Race Tech for the springs, Gold-Valve kit and fork oil.
Penske for the help in getting the rear suspension sorted.
GSG Moko for the frame sliders.
Jeff, Jen, and Jeremy at Cycle Max for their installation and tuning expertise.
Comfort Inn in Belleville for the accommodation during the Shannonville track sessions.
COST BREAKDOWN (Suspension and final race prepping)
| WORK/COMPONENT | COST (at source) | COST (Canadian dollars) |
| Race Tech Gold Valve kit – Standard type 1 |
US$159.99 |
$194.84 |
| Race Tech fork springs | US$109.99 | $133.95 |
| Race Tech 10W fork oil (2 qt required) |
US$49.98 (US$24.99/ea) |
$60.87 |
| Installing fork springs and Gold Valve kit (4 hours) | C$320.00 (@ C$80.00 per hour) | $320.00 |
| GSG Moko frame sliders | 84.00 Euros | $123.91 |
| Penske 8900 series shock, with 8981 compression adjuster | C$947.45 | $947.45 |
| Pirelli Diablo Corsa tires (front and rear) | Front: C$241.00, Rear: C$311.00 | $552.00 |
| Safety wiring the bike (2 hours) | C$160.00 (@ C$80.00 per hour) | $160.00 |
| TOTAL (pre taxes) | $2,493.02 |
Note - US$ converted at 1.2178. Euros converted at 1.4751.
![]()