|
|
||||||||
"No one rises so high as he who knows not whither he is going"
Oliver Cromwell on the perils of a plan.
 |
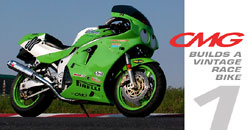
| I crashed it, I bought it. |
As with most things in life, you’re often better off not knowing what you’re really getting into prior to embarking on a new endeavour. This was definitely the case when we decided to get the CMG ZX-7 project bike up to snuff and 'competitive' for the VRRA Mosport Endurance Race earlier this year.
You may remember that by the end of the 2003 season, I had managed to fully resurrect the ZX (after my unfortunate 'you-crash-it-you-bought-it incident), concluding that while the mill was plenty powerful for my skill level, there were still some problems due to (what we thought were) lean-running carbs.
 |
Expert advice pre-smoke break. Photo: Flair Photo |
In typical CMG style, this had been 'cured' on the track by leaving the choke half-on! It helped, but it wasn't a very satisfactory fix. By the time I hit the track for the first ride of the ‘04 season, CMG contributor, Ronn Moffatt had thoroughly cleaned the ZX’s carbs, and I had Kreemed the tank.
With these improvements, along with the necessary spring check-over, fluid changes, etc, I thought we'd finally sorted out the mid-range power hole and would be ready to race! How wrong I was would be graphically illustrated by my tale of woe during this first track session – which also happened to be a BYOB FAST School. It appears that the carbs needed more than cleaning – indeed, a tuning was in order.
Editor ‘arris, upon hearing how badly things were going with the bike, decided he should dust off his now moth-eaten mechanic’s coveralls and come to the rescue. This, by the way, amounted to offering theories and suggestions and then wandering off to have a smoke or a nap in the car while I did the actual work. He would then mysteriously re-emerge when the bike was ready to ride.
 |
"What an effing pig!". Editor 'arris comes back to the real world. Photo: Flair Photo |
Pah, that's gratitude for you. I think my theories were the ones that made it (almost) rideable again? Bloody ingrates – I'm off for a smoke. Call me when it's ready – Editor 'arris.
So, at a track day that saw the ZX-7 more often in pieces than being ridden, we were able to somewhat address the massive hole in the powerband by adding three shims to each of the non-adjustable carb needles. The still slightly scary handling characteristics were also helped by maxing out the front suspension settings.
By the end of the day we had managed to have the bike working significantly better than when we started. However, a now-spoiled-by-brand-new-bikes-at-press-launches Editor ‘arris declared that unless we got the engine running cleaner and the suspension further sorted, he didn’t think we should even consider racing the thing.
So now what?
PAGING DR. BLOOR
 |
| Doctor Bloor at your service ... |
I was severely reluctant to call Jeff Bloor at Cycle Max, but he seemed like the best guy who could cure the Kawasaki’s ailments (we’ve worked with Jeff before and have always been impressed with his knowledge and tuning abilities).
My reluctance came from a much earlier phone call to Jeff when I had initially fallen (literally) into the purchase of the ZX. His advice at that time was something to the effect of, “do yourself a favor and sell that POS and just buy a newer 600”.
However, desperate times call for desperate measures, and I took a deep breath and made the call. I must have caught Jeff on a good day, or maybe he’s just softening in his old age, because at the end of the conversation he said, “okay, if you show up with a pipe and jet kit, I’ll make the thing work.”
 |
| Less lbs, more dBs! |
Two weeks later I was darkening the Cycle Max door – pipe and jet-kit in hand.
SORTING THE MOTOR
The preliminary dyno runs confirmed Jeff’s belief that his recommendations would get the bike into a happy place.
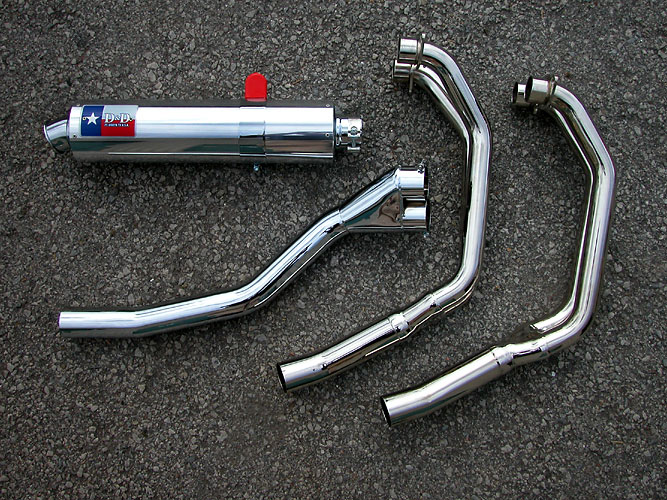
Work on the ZX began by stripping off the stock exhaust system. Donny at D&D Exhaust in Fort Worth, Texas had enthusiastically embraced our project and had sent us a full system. It’s important to note here that finding performance parts for a fifteen year old bike sometimes “creates challenges*”. To their credit, D&D have an extensive range of exhaust system offerings for a wide range of bikes - even more 'mature' ones.
* euphemistic term
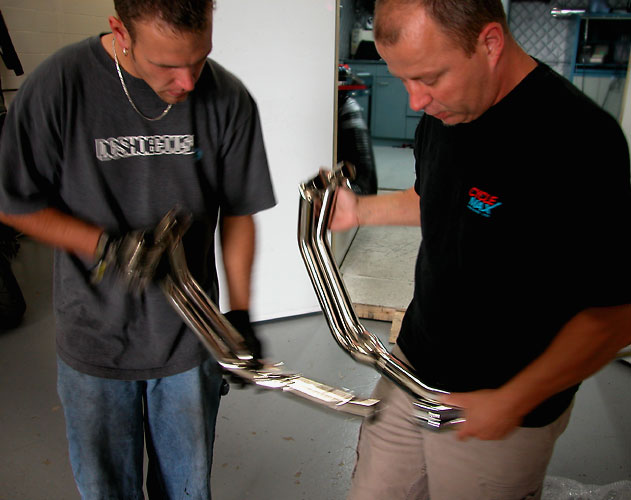 |
| "You just hold firm and I'll shake mine and push it in". Jeremy and Jeff get personal with the pipe. |
Jeff commented that this particular exhaust system seemed to be designed with an emphasis on a drag-pipe configuration – apparently, a combination of a larger diameter collector with a short head pipe length equals a pipe biased towards top-end power. This left me curious to find out how the bike would later perform on the dyno, but more on that later.
Installation was relatively trouble free. It did however require some tweaking, as the header pipe did not line up perfectly with its mate. The solution was to bolt the can to the outside of the peg bracket (stock is bolted on the inside of the peg bracket) in order for the pipe to clear everything nicely.
Once together, it looked pretty schlick – beautifully chromed, with an aluminum can. The can has a slight cant upwards compared to the stock unit, and it is physically smaller than the original. A weight saving is an additional spin-off of installing a full D&D system on a bike of this vintage. Although we didn’t have a scale to weigh the bits, D&D ballpark the weight savings of their full system to around 10 lbs, compared to the stock system.
THOSE DAMN CARBS
 |
| Adjustable Dyno Jet needle is on the left. |
I was quite happy to have someone else tearing the carbs apart for a change. I was even more pleased at the prospect that if all went well this would mean the end of the carburetion “experiments”.
Dynojet had come to the rescue with a Stage 1 jet kit that was recommended for the relatively simple tuning that we were doing to the bike. This kit contains new needles (that have adjustable clips), a selection of main jets, and reduction sleeves for the main jet air passages.
Installation of the kit necessitates drilling out the slide vacuum passages with a provided drill bit. The kit seemed relatively simple to install, but Jeff did a few additional things that are not mentioned in the Dynojet instructions – like double-checking the cleanliness of various jets and passages and then sealing the vacuum diaphragms with a Teflon-based lubricant.
During the process of installing the Dynojet kit, it became clear that my earlier carb woes had resulted from removing a baffle system on the airbox. According to the Dynojet instructions, doing this necessitates upping the main jet two sizes more than if you were to leave the air box stock. Done!
Although I think that after having the carbs apart several times, I probably could have figured out how to install this kit, I was quite happy that someone more familiar with all this stuff was handling the operation.
SO DID IT WORK?
 |
Oh yes!
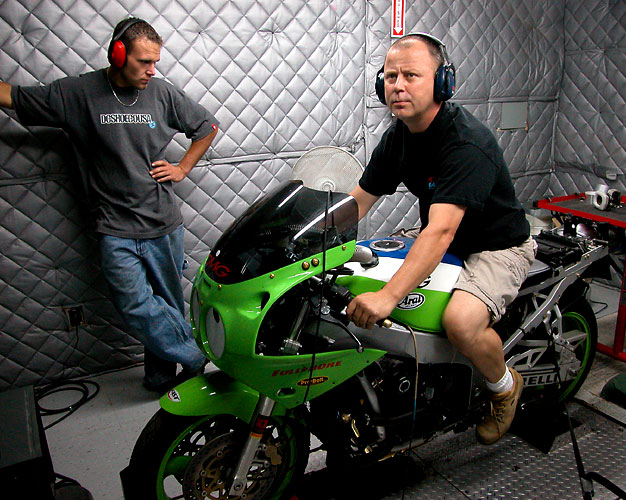
The bike sparked to life quickly after the carbs were bolted back together, and the sound emanating from the exhaust immediately let us know that this was a significantly changed bike.
After syncing the carbs, the ZX was back on the dyno. What was immediately apparent (even with industrial ear protection) while running the bike to red line was that it was FOOKIN' LOUD when on the gas! Music to my ears really, and if you don’t like your neighbours, this is the system to get, although in reality this is not really a suitable road system.
Note to self: In future, no more test runs down the back alley …
WHAT’S WITH ALL THOSE SWIGGLY LINES?
 }) |
 }) |
| Power. | Torque. |
Those used to looking at dyno sheets from current-model motorcycle engines will be initially horrified at the irregularity of the torque and horsepower graphs. It’s truly amazing how far motorcycle engine development has come in the last 15 years – but with that said, what you're looking at is a picture of an engine with character!
The improvements (in blue) gained from the pipe and jet kit are immediately apparent. Although the max horsepower and torque have not increased dramatically, both curves fattened up almost everywhere in the rev range. This is what we were looking for – more useable and freer flowing power.
You’ll notice a couple of dips in power at 4,000 and 6,000 rpm. Jeff explained that the dip at 4,000 rpm is fairly standard for bikes equipped with a Dynojet kit – caused by drilling out the slide to increase vacuum to the diaphragm.
 }) |
| Power to Speed. |
This causes the slide to thwap open as soon as you’re on the gas. This thwap, and resulting massive rush of mixture into the cylinders, overwhelms the engine for a microsecond and then the cylinders proceed to happily gobble it up. Thankfully, it's generally not noticeable while riding, especially in a race environment.
The second step in the power that occurs at 6,000 rpm is caused by a mix of the original engineering of the motor combined with the D&D pipe characteristics.
What is perhaps more interesting than the horsepower and torque graphs are the graphs that illustrate the power to speed ratio, and the speed to elapsed time. These are the graphs that best show the substantial real world improvements that the performance parts were able to yield.
 }) |
| Speed/Elapsed time. |
Our biggest beef with the bike before it went under the knife was that the power was rough and glitchy when rolling it on out of the corner. On the power to speed graph you can see the dramatic improvement – in particular above 3,000 rpm in 1st gear.
Max power in each gear is also up an average of 5+ horsepower.
The initial stated max power of 100.8 hp is actually inaccurate due to a spike caused by tire slippage in the 4-5 shift. Max power before modifications is more like 97 horsepower.
More interesting still is the speed/elapsed time graph. Check it out – at just a little over 2 seconds, while on the gas, there is 10+ mph increase in speed with the mods, and it just gets better from there!
It seems that we were finally making progress.
ENOUGH OF THIS GRAPH CRAP, HOW DID IT REALLY WORK?
 |
You can actually see Ronn grimacing from the noise. Photo: Flair Photo |
Several things were confirmed when we put the newly tuned ZX on the track. The first was that the CMG vintage race bike was now in the running for the LOUDEST FOOKING BIKE ON THE TRACK award.
CMG vintage racing teammate, Ronn Moffatt didn’t have ear plugs for the first few track test sessions and admitted that the sound the bike was frightening him to the point of not being able to open it up.
Those who like the sound of an uncorked raunchy inline four will LOVE the sound this bike makes. Those who don't ... won't.
I never totally bonded with the ZX prior to these engine mods, but quite frankly this was a changed bike. The power flowed significantly freer. It was still soft (but smoother and glitch free) below 6,000 rpm but when it hit that magic number, you had to make sure you were hanging on because it stepped up with authority.
 |
Happiness is a smooth bike. Photo: Flair Photo |
On the track then, we were looking at a racing rpm range that started at 6,000 rpm and climbed to 11,000 rpm, at which point the power was starting to tail off. If you needed to wring it out a bit more to avoid a shift, another 1,000 rpm was now available.
Despite the grief the bike had caused me before these engine modifications, I had still managed some sweet moments with the ZX, but now, like the motor, these moments were more readily available.
THE SAGA CONTINUES…
So all was now happy with the motor, but the story is not over yet. Stay tuned to see how we finally sorted out the suspension, info on tire selection, and the final bike prep required to get the bike through tech for the VRRA Endurance race.
Engine Modification Costs:
 |
The ZX-7 didn't realize that a 'rub & tug' was also part of the service. |
| Dynojet Stage 1 Jet Kit | $139.95** |
| D&D full exhaust system | $1179.99** |
| Installation
and dyno testing (Cycle Max) (4 hours @ $75.00 per hour) |
$300.00 |
| Total |
$1,619.94 |
| **Canadian pricing provided by Parker Bros. |
THANKS TO:
D&D Exhaust for pasting a grin on my face whenever I twist the throttle on the ZX.
Dynojet for the Stage 1 jet kit.
Jeff, Jen, and Jeremy at Cycle Max for their installation and tuning expertise.
Flair Photo for the track photography.
Comfort Inn in Belleville for the accommodation during the Shannonville track session.
![]()